Once you link a source, your external data can be used alongside the rest of the PostHog.
Visualizing
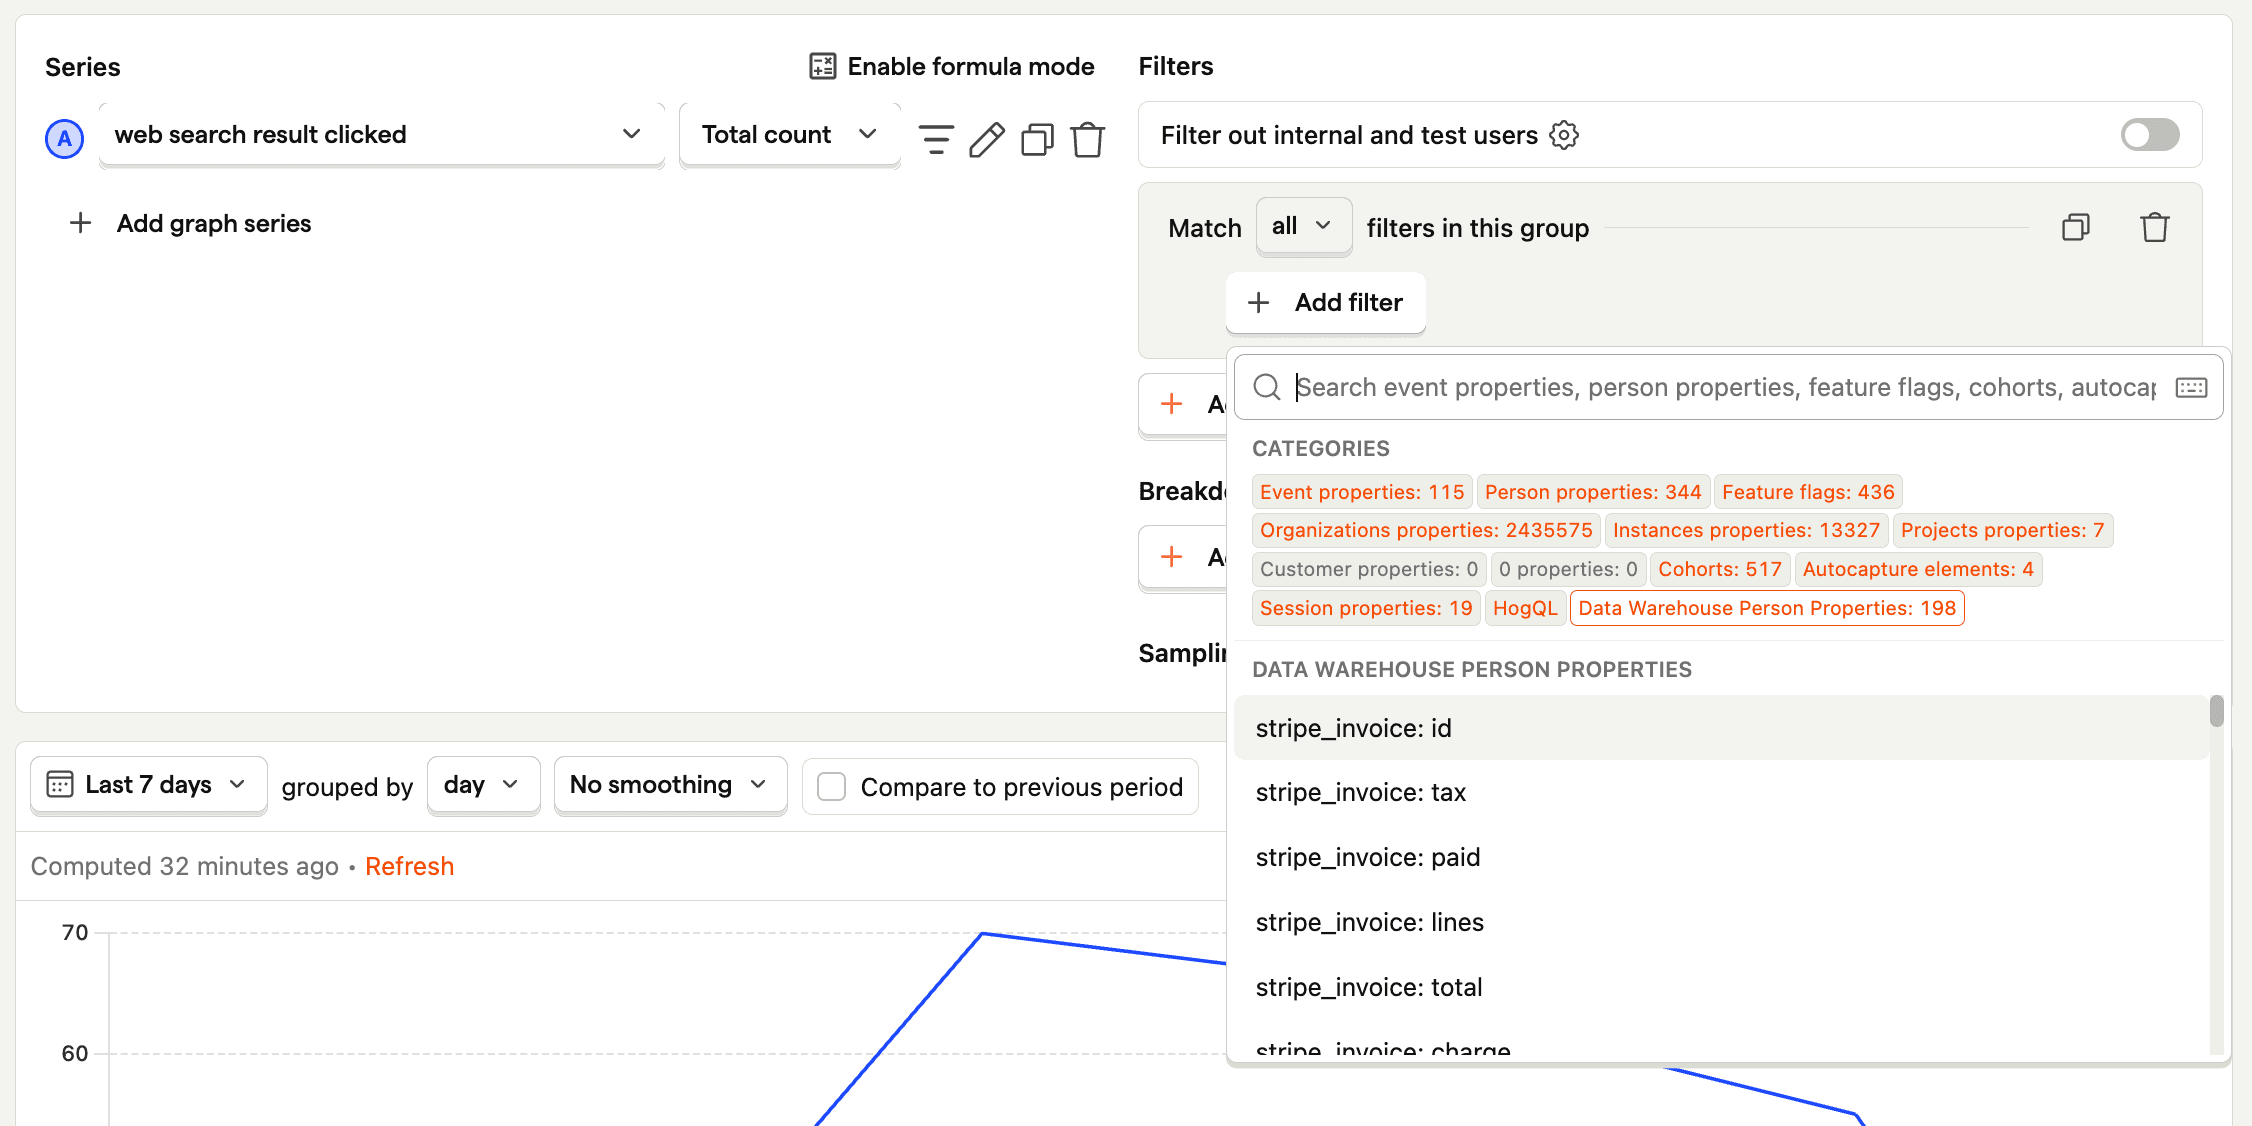
Data synced to the data warehouse is available for use in insights, just as events and actions are. You can select your data warehouse data as a series in the dropdown when creating an insight.
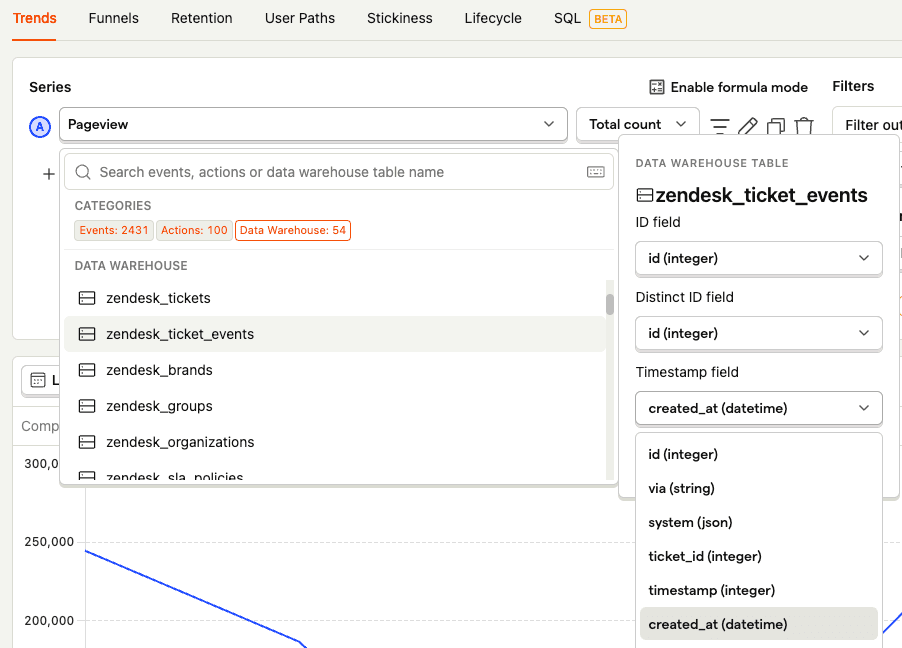
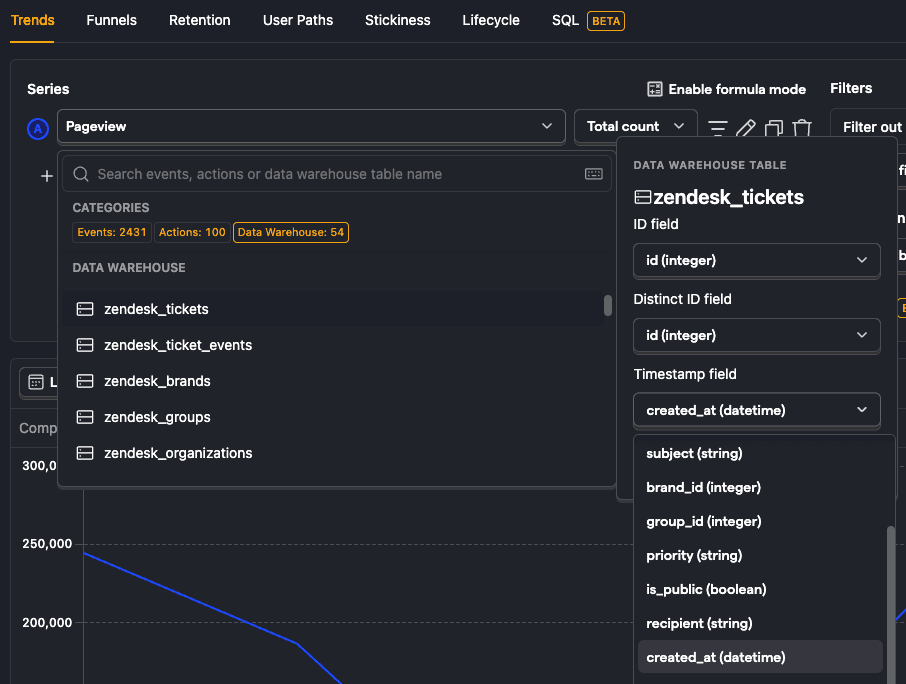
The main difference from events is that you must identify 3 fields from the data warehouse data to visualize it:
- ID: A field that corresponds to the ID of the element.
- Distinct ID: A field that corresponds to an ID representing the user associated with the element. If none, can match ID.
- Timestamp: A timestamp field representing when the element was created.
It's infeasible for us to map these fields. We pre-fill with a best guess, but allow you to edit it.
Filtering
Once you select a data warehouse table to visualize, you can filter on the related data in the schema under the insight specific filter dropdown.
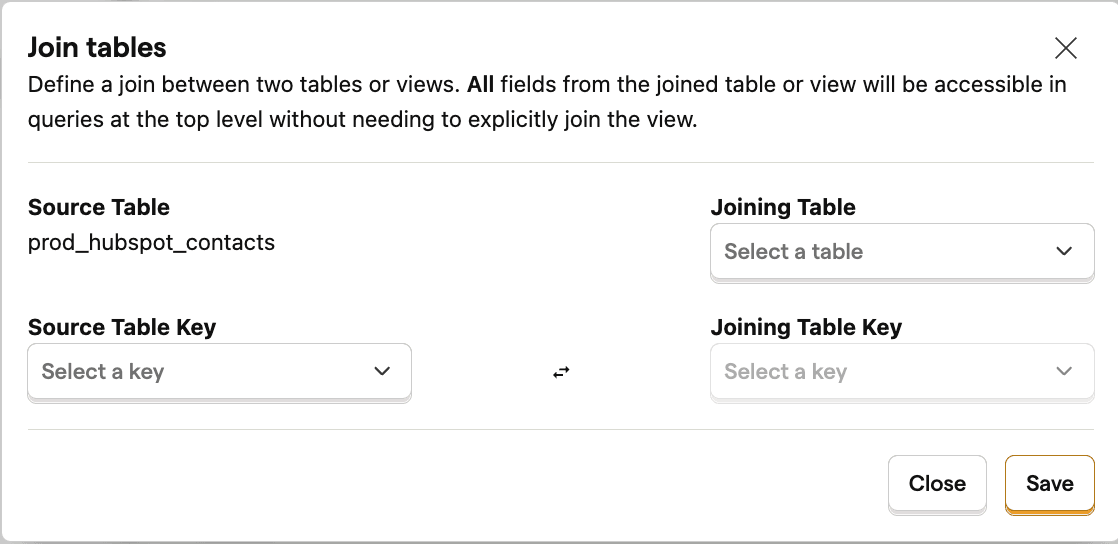
Joining
You can join external data on existing PostHog schemas and other external data tables. These joins are saved and interpreted anytime they're accessed on the origin table. For example, if you import your Stripe data, get a table stripe_customers, and define a join between events and stripe_customers, you can then query SELECT stripe_customers.id FROM events.
To define a join, go to the data warehouse tab, select the origin table of the join, click "Add join", and define the join parameters.
Special Joins
Joining data warehouse data against the PostHog persons schema enables the data to be used as person filters within an insight.